In this tutorial, we are going to mount an additional hard drive in Windows. As you may notice, we will do so in Windows Server 2012, but the procedure is basically the same with Windows Server 2008.
At first, we need to open a menu by right-clicking the Start button:
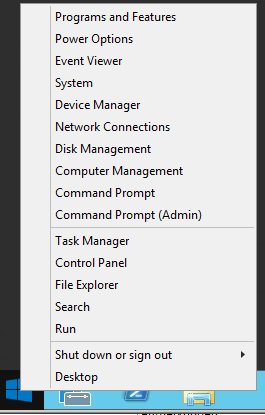
We must select Disk Management to open the Disk Management service. If Windows identifies a new hard drive, a pop-up menu opens:
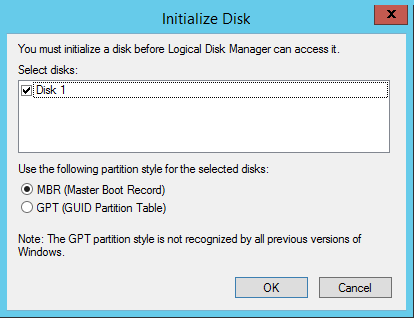
For volumes smaller than 2 TB, we choose MBR, for larger disks, we select GPT. As the hard drive in our example only has a capacity of 100 GB, we’ll go with MBR here. By clicking OK, the chosen partition table will be written to the hard disk. After that procedure, we will be sent to the main menu of the Disk Management service. Alternatively, one can reach this overview via Control Panel => Computer Management.
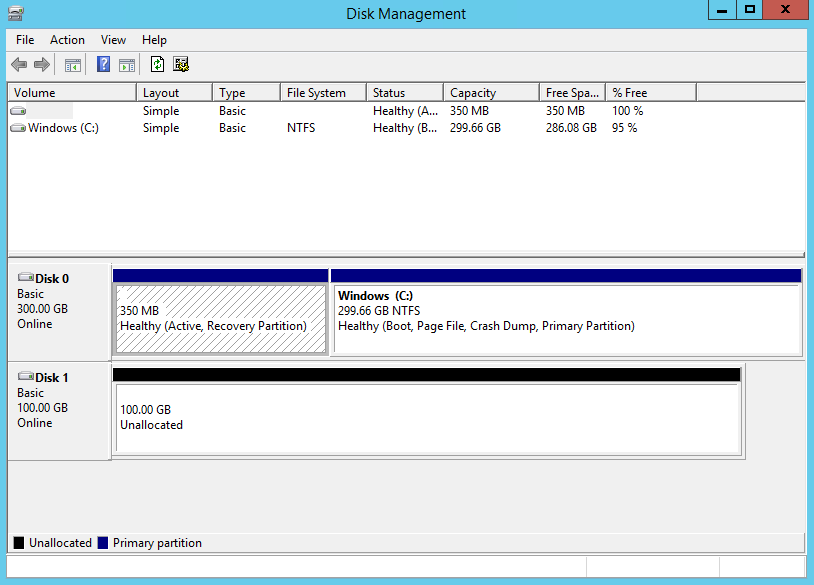
As we can see here, our new hard drive is listed as Disk 1. But before we can use it for storing data, we need to partition and format it. Therefore, we right-click the rectangle next to the box which says Disk 1 and choose New Simple Volume.
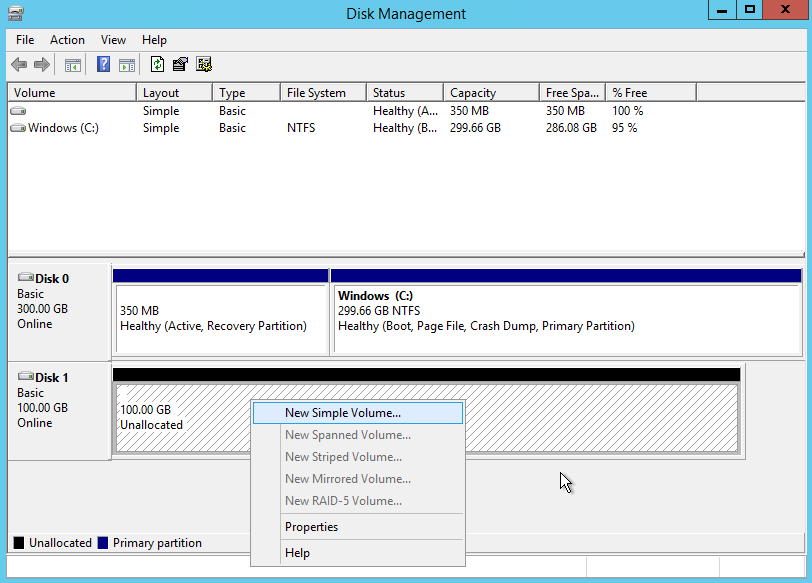
A wizard opens. It is quite self-explanatory and you can’t do anything wrong by using the pre-selected and suggested values. Per default, the wizard uses the whole disk capacity for the new partition and formats it with the file system NTFS, which is recommended for Windows. Of course, you are free to change those settings, but in our example, we go along with them.

The name of our new partition is STORAGE, but of course you can name it as you wish.
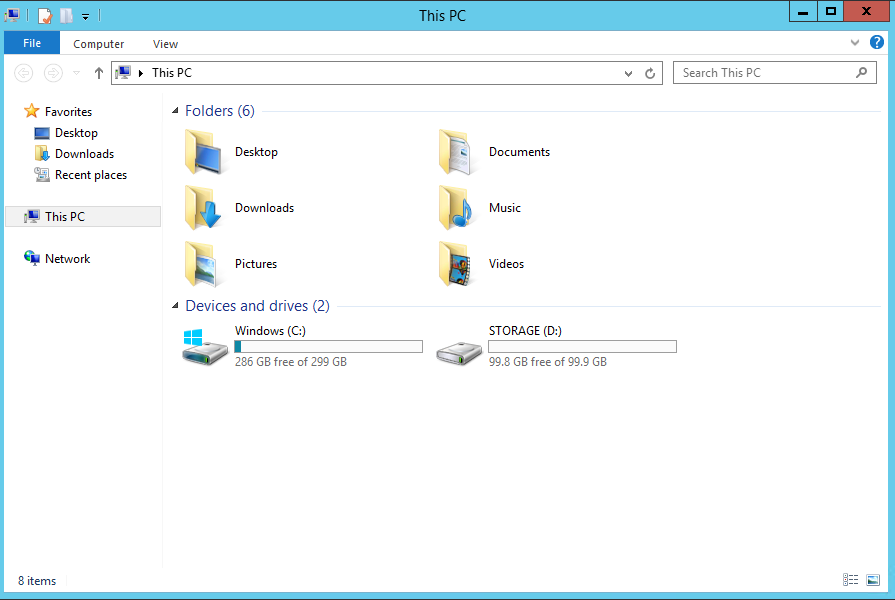
Once you went through the wizard, the new hard drive will be ready to use. It will also be visible in the Explorer: